Sunday, November 22, 2009

3 Set Table Design


Currently involve in designing of wooden table, for which i have made a 3D design...Currently i ma working on some special carved wooden legs for it...

This is another big project for my home and it is very time consuming;)... You can see my machine carved the center design in three portions and it comes out great..Currently i am facing problem with my only ball nose bit that is blunt and burning the wood..I have used it 3-years with all of my 3D projects...

I will be glad if someone contribute me few ball nose bits... You can contact me on my email address , i can send you my Posting address and specification of tool...

360 degree Plane less Scan of Deer


I am reading David's Forum from a couple of years...But a tetra-couple of months ago,I tested this great software with a Free Version...Even my crude setup gave me very good results...I continued to improve my setup day and night and getting improved results... The time has come when my scans were so good that i was in need to save those scans in High Resolution mode..In the mean time Sven and Simon put their best in David, a planless feature, communication with COM and SL functionality...

I know that David is a very low-cost solution for all of us having Home-setup and hobbiest... and I also know that the great minds their are always thinking of increasing the function
ality of this software.. The VISION of David team is great....

Furthermore, I saw many helping hands in this forum like Greg, Walter, Gunter, Mattia, Ray and all of the David community...

This compelled me to buy this great software..But the revolution didn't come in one day.
. I started collecting money throughout the year to improve my setup and to buy this software...

and Today was the day of extreme happiness when i recieved the USB in a very good packaging.... Now I am able to scan and save in High Resolution Mode.. Thanks Sven and Simon and all the helping hands:-)

After Getting the david USB, I made my setup in such a way that i only need calibration once and now i can let my hardware anywhere and start scanning, no matter how bigger the object..I can scan it in patches and can merge all the scan..

Attached you can see the 360 degree scan of the Deer..

Sunday, October 11, 2009

My Laser Scanner DIY Setup

From a week i am working to improve my David Laser scanner setup.. Earlier, I have a stepper motor attached to 1:60 gear box..The output was very coarse with jerks so yesterday i made MDF bearing holders and grabbed teeth Belt and Pulleys from local market..After minor modification the output from the gear box further reduced to 1:7 with timing belt..Now i can scan with very high resolution..Attached is the low resolution scan from free version of David Laser scanner..Its smoothness and interpolation kept to one..You can see how small the object with details...
The green laser pointer was gifted by my friend Richard..i made a teflon attachment with a lens to convert it into Line laser...


This improvement of setup was carried out because i want to make some ball-claw legs for the table i am machining.. The idea was to take the leg of hen and insert a marble ball into claw and scan...

Saturday, October 3, 2009

Bear Jewelery Box


Sometime its good to gift something special to wife... This time i decided to make something very special to her, a Jewelery Box... What about the jewellery box in shape of a Bear?...!!!.. Yes, a lot of girls and ladies like Bears.. I don't know why?..

When i finsished this on my CNC machine and gifted to her... She was really very happy ... Now i can continue some other projects on my CNC machine ;)

Thursday, October 1, 2009

My Head Post

Frankly speaking what fascinate me to make a indexer for my machine??... This story begins with the day when i joined CNCzone Forum... One of the guy their working on its 4th axis created a BEAR head on wood...He posted the picture of machined head stand aside with its computer monitor... and that was the really great work i ever seen.. i downloaded that picture and saw it many time that day...
At that time i was very new to CNC machine.. i never built my CNC machine at that time..i was just collecting the pictures, ideas and reading the posts of zone members... its a really great website for all of us with zeal of working with CNC....


The complete time for Roughing 13 Minutes and Finishing pass took 1 Hr and 13Minutes...The stepover and tolerance were kept high so the quality was not come out great.. but this is in my hand.. The main was i know how to create efficient 4th axis toolpath..

If i decrease the stepover and tolerance values..you will see the quality, details and real beauty of it..

Tuesday, September 29, 2009

Carving on Candle Holder


I tried some carving work on a candle holder.. I was amazed about the accuracy and repeatability i am getting in my 4th axis... We bought some candle holders (marble) from local market and decided to make wooden stand for it.. The picture shows one of the candle holder with beautiful carving..This candle holder was sold 20 US dollars to one of my friend in Funfair show.. I have lot of orders but time do not permit it to commercialize my products... Its difficult to make something for my home.. I decided not to participate in the Funfair shows..This will make my house full of my home-made wooden stuff...

Carving on Candle Holder

I tried some carving work on a candle holder.. I was amazed about the accuracy and repeatability i am getting in my 4th axis...

We bought some candle holders (marble)

Carving on Candle Holder

I tried some carving work on a candle holder.. I was amazed about the accuracy and repeatability i am getting in my 4th axis...

We bought some candle holders (

Carving on Candle Holder

I tried some carving work on a candle holder.. I was amazed about the accuracy and repeatability i am getting in my 4th axis...


Carving on Candle Holder

I tried some carving work on a candle holder.. I was amazed about the accuracy and repeatability i am getting in my 4th axis...

Carving on Candle Holder

I tried some carving work on a candle holder.. I was amazed about the accuracy and repeatability i am getting in my 4th axis...

Sunday, September 27, 2009

My 4th Axis Version

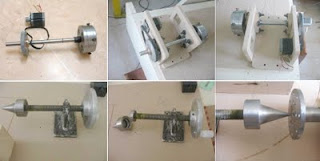
When i build my first CNC milling machine, It was in my to-do list to make a 4th axis for it... But i was having no idea how i will generate the G-code for it and what hardware i use to make it!!!.. I dont want to spent so much on it too..... I had two options, to make it belt-driven or gears driven... I decided to make it simple as i can.. and the best option was to make it belt-driven... i need one belt, two timing pullys, one shaft and a wood holding chuck and a tail-stock... Now to make it more DIY i decided to make the tail stock and wood holding chuck myself..and all the mounting from MDF... I never afraid of failure, and i think if one afraid of failure he can never get succeeded... You can see i first made the chuck from a pipe and plate with 4-jack screws for holding workpiece..but later i changed my this version of chuck and made it more simple...To remove the slack from the belt, i added idler pully... I used 200Oz-in Motor and later you will see what i created from this simple and low-cost arrangement...

Thursday, September 24, 2009

Two Days and 209 Visitors


I am thankful to all of my friends across the world who visited my blog and left comments... Just two days to start this blog and 209 visitors across the world who took time and patience to read my fractured English... Thanks to everybody...

Now i permitted everybody to post comments on my work...You don't need email account or verification for posting...I will be happy if the comments are related to my work and can help me improving my new projects.
Regards

PS:
Did i mentioned that you can click on the picture to see them bigger?

Wooden Carved Chest


Again this time my wife stressed me to make some siting arrangement in the TV Lounge... and she came up with idea of Chests.... Yes the Chest with Storage box... Did i mention that She is genius ;)... The complete designing was done with mutual understanding by keeping in view of Location of placement and the height of these chests.. Also we decided to make two different types of designs on each side.. The idea was that whenever we want a change in TV lounge we will rotate the chests with required design in our front... It was a huge project for me and time consuming too... However we manage to do the work in the weekends... As the project was big so it took a month or two including staining etc... The carving came out great... I don't know how long it took to purchase the cushion for these chest but if i remember the chest lay down in TV lounge for more than two months without cushion.. Stop....did i mention that i am very lazy...

Wednesday, September 23, 2009

Duck Pond


The ducks you are watching in the pictures were purchased and not carved by me... Both ducks were having very odd shaped acrylic base..When we saw those ducks in shop at Lahore City, they attract our hearts and we decided to make a pond for them..

And then on coming back, we brain-stormed on many types of ponds... After finalizing the design in CAD and CAM software , i decided to carve it out on 'Mango Wood'.. Later we decided to add some holes in the Pond to a
ccommodate the fresh grass as a cat-tail..

This pond is not with us..My mother liked it so much that i gifted to her..she w
as very happy at the moment...

Leaf Platter

When we visited Peshawer, one of the biggest City of Pakistan, we went through a big bazar called 'Bara Bazar'.. This bazar is best known for the stuff from china.. All the stuff is very very low cost and there are many streets in this bazar , each street is for similar type of stuff... For example if one street represents the Electronic stuff then the other street represent Cutlery market.. You can easily spend several hours in one street just watching the beautiful stuff ( window shopping)... We saw some nice coloured glass bowls and the idea came to our mind to make use of them for salad platter... ;) On return we saw our shopping and segregate them on priority basis... Salad Platter was simple so we made one ... This salad platter later sold to a Chinese Couple on 12 Dollars in our Funfair show..

CNC Carved MDF Table


My wife is fond of furniture stuff..and my CNC is a big hurdle for her buying furniture... Whenever she insist me to buy ,I always tell her that i will make one for her, and the time passes without any work.... Once she asked me to make a coffee table and i think its a year now and the project is still pending... I am very lazy ...

Basically the furniture here in my country is not unique and you can find the same style and design at everybody home... I and my wife like uniqueness... This is the reason whatever i made so far for my home , you can never find it in anywhere in this universe and this is one thing that make us happy and satisfied beside the laziness...

One day when she asked time and again for a table.. i decided to make one with knock-down style... I sat on the CAD and asked her to review the design... she changed the whole carving stuff and made me a little angry ;)..But when she put the carving vectors on the CAD i was really impressed.. From that day i always take advice from her for any new project ;)

The table is still unpolished and we kept it in our drawing room for a month then my wife throw it away in the STORE (junk yard)... From there the table moves to my sister home...

Now, again, i have to work on Wooden stuff to make her happy...

Tuesday, September 22, 2009

Door Scenery


I like wooden carved doors very much... In my country carved doors are in abundance but they are out of reach because of high prices... I started work on this project to make a complete door.. Later on i found that making this door was a huge step that gave me confidence in building big projects...

I decided to make a scenery panel that will embed in the center of that door.. My wife took that task and she made a scenery after hours of efforts..with a little review we put our machine into action.. I was in office when my wife called me and told me that machine is making huge noises during carving..she decided to stop the machine because of smoke and that abnormal sound but i stopped her and told her that keep the machine running....at-last the job was finished...

I know that due to high depth of cut and feed the machine has been put into its extreme..so we were getting noise and smoke..next time we decided to make Gcode that machine can tolerate

A Scenery for Lobby

A long time ago when we shifted in new house, we found our lobby very empty..We (Me and my wife) decided to place a big scenery on the wall.. :).. The scenery was designed by my Wife and i carved it...The tool used is 12.5mm 60Degree V-bit with 5mm DOC/pass... It took 3.5 Hours to machine at 80IPM... The material i used was 12mm MDF.... After machining MDF my house full of MDF dust.. I was totally covered with MDF and i was looking like a ghost.. I simply hate MDF...

Candle Holder


When I was a child i was bit fascinated by watching wall candle holders in movies especially in the castle.. ;)... Wall candle holder gives a good lighting effects and make a romantic scene in your house.. I decided to make one for my home...

I carved out and it took 6 hours for the whole carving process.. After staining and installing on the wall, when i lit the candle..You don't know how happy was I... It was a real great addition to my home...

Cutting Clouds


My son 1st Birthday ahead so i have plans to renovate his room... I like natural sceneries, so i made some clouds in a CAD programm... Imported those clouds into CAM software and generated the toolpath for it..

These clouds cut from 6mm MDF ... Painting of MDF is really a very difficult, MDF sucks the paint so i first applied a mixture of wooden glue and water and then applied on the clouds..when it was dried i painted 3 coats of white enamel paint..

Attaching and arranging clouds on the wall was a very difficult task.. The room is still under renovation My wife worked on Roman Blind and it enhanced the looks of the room...

Monday, September 21, 2009

My First 3D part


A couple of years ago, i was unfamiliar about the types of wood and its beauty... My first CNC machine that i built from scratches was not for the purpose of wood carving, but it was my dream a decade ago to whatever 3D modelling i am doing on CAD software can become a reality and in physical shape...

When i first made my CNC machine i start experimenting on wood, because wood is cheap and easily available..From then, i am deviated from the original cause of this machine and started working on wood related stuff especially the furniture and carving stuff...

From then i am involve in a number of Forums in the world and i really enjoyed watching others work and producing my own.. Following was my first 3D caving i made on my machine..The 3D part not clear but that day i was very much happy... That was a great day.. I showed that part to a number of my friends and they guessed different things n it.. actually that was a 3D relief of flying geeses....